2016-05-01: I replaced the rubber dampers on my Nibe 360P heat pump because the old dampers failed. The failed dampers caused the compressor to be fairly loud, perhaps 10x louder than normal, usually for the first 10 minutes after compressor start-up. After the replacement, the compressor sounds OK again. In 2018, it still works fine.
Gummidämparna på min Nibe 360P värmepump gick sönder. Som föjld lät kompressorn ganska illa, oftast de första tio minuter varje gång den startade. Jag lade in nya, bättre dämpare och nu låter kompressorn OK igen.
Sometimes, when the compressor on my ten year old heat pump started, it got into a resonance which made it about 10x louder than normal. The resonance could often be stopped by firmly slapping the right hand side of the chassis. The "loud resonance noise" got more frequent as a few years passed, sometimes continuing for an hour or two. I wondered if the problem was a broken compressor (but it still produced heat and hot water) or a loose part of the chassis resonating.
Easiest way is to look. Takes about 10 minutes. Here's what I did:
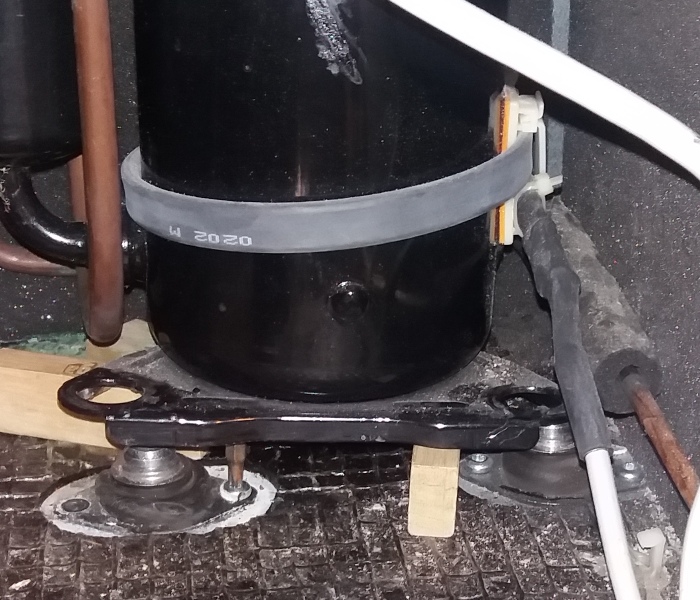
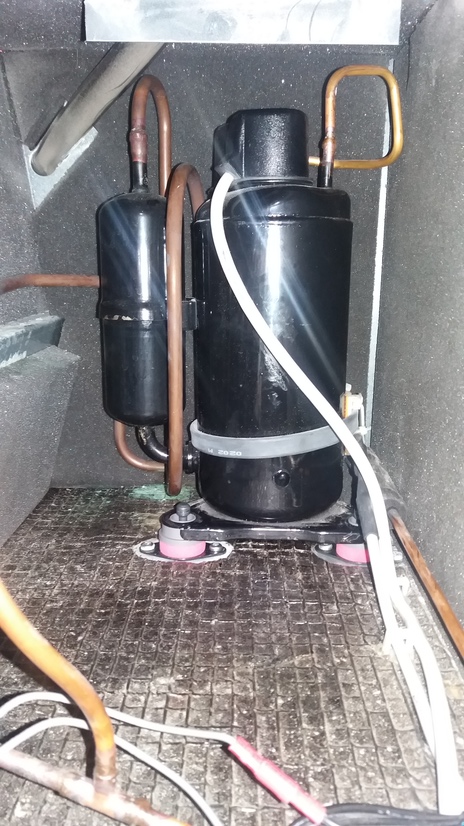
The photo shows two of the three dampers. The left is only about two thirds of the height of the right one; time, heat and vibration have caused it to collapse. You can also see that the compressor's foot has gouged a chunk out of the rubber damper. That's probably where the noise was coming from.
I ordered new dampers online, from www.eldkraft.se. They cost about 300 SEK (roughly 30 EUR). They're probably also available directly from Nibe. According the the leaflet which came with the dampers, they're suitable for Nibe Fighter 200P, 310P, 315P, 360P, 410P, F205P and F470. According to Nibe's spare parts site, the part number for the dampers is 434785.
The screws attaching the dampers to the chassis are hard to get at, especially for the rear damper. I made two tools: first a chopped Torx-25 bit punched into an aluminium handle and then a small ratchet with another Torx-25 bit inserted directly into the ratchet (this required grinding the bit to the right size). The ratchet needed two handle lengths, about 100mm for the front two dampers and about 250mm for the rear damper:
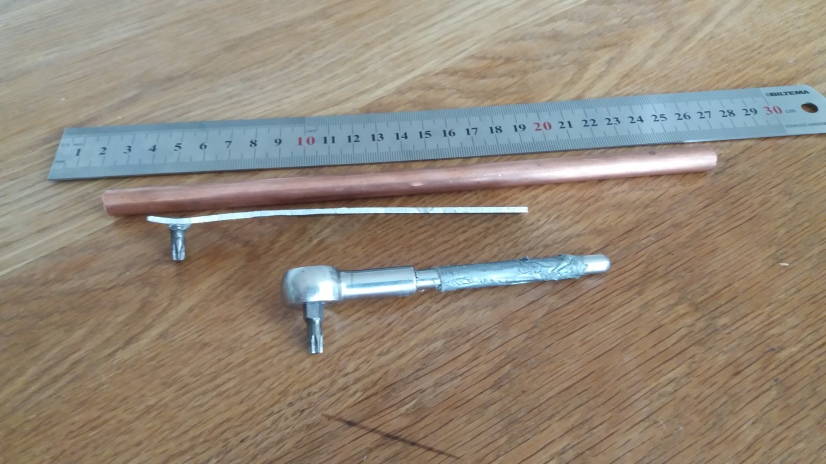
I got a tip from a guy in Estonia who read this page and did the swap: the best tool by far, if you have one, is a 90 degree (right angle) adaptor for a battery screwdriver.
I turned the power off at the fuse and waited until the compressor was cool enough to touch.
I removed the clips at the top of the dampers. They prevent the compressor from lifting. The front two are trivial to remove. The rear one is a pain. I used a mirror and hooked it with a bicycle brake wire after many tries.
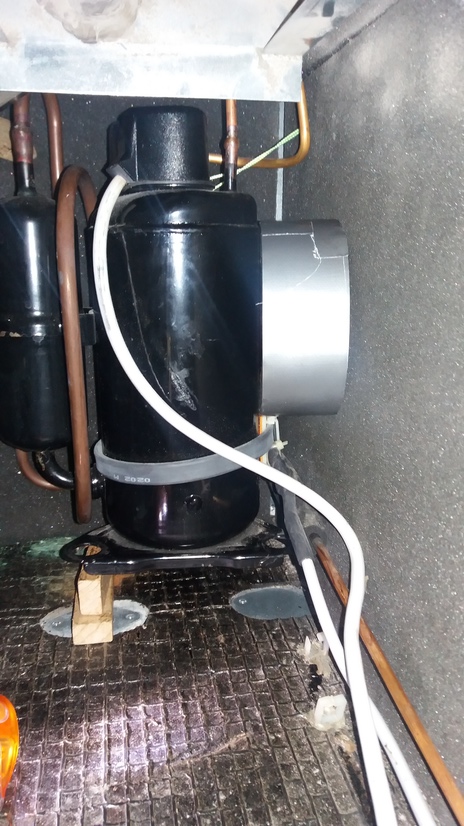
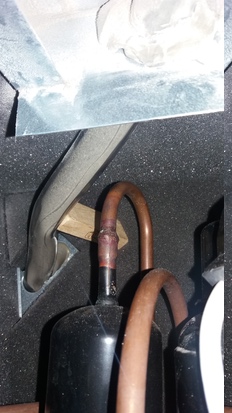
Next, I lifted the compressor clear of the dampers, straight up. I did that by carefully lifting it a centimetre on one side, putting a wooden block under, then pushing it the other way and putting a block on the other side, and so on. I used different size blocks until I had the compressor about 40mm up in the air, like this:
I had to unhook the white cables to prevent them from pulling the compressor down. I also had to move the 30mm diameter plastic hose above and left of the compressor:
The front two dampers are fiddly to unscrew because of the limited space. The third damper, behind the compressor, is horribly placed. Working with my home-made Torx "spanner" was very slow. I then made the miniature ratchet, which worked much better.
This was straightforward, the hardest part was getting the screws in. Once I had all three dampers screwed in place, I lowered the compressor onto them. I skipped re-installing the clips, I think they're only needed for transport. The whole job took me about three hours, including figuring out what was wrong.
The new dampers made the compressor run as quietly as when it was new, possibly slightly quieter because the new ones are a better design.
My heat pump still works fine. A few people (in Sweden, UK and Estonia) have mailed me to say that they did the same swap successfully, which is great to know. One person in Sweden paid a local heat pump technician to do it, it took him just 15 minutes.
The photos here are from my Nibe 360P which I think I bought in 2006, in Sweden. One reader has one from 2005 or maybe 2006 and reports that the dampers had one mounting hole each, not two. He had to drill new holes and use self-tapping screws in them to install new dampers.
My Nibe 360P had a compressor failure after 13 years of operation. A bit disappointing, I was hoping for 15--20 years of operation, but not a disaster either. Replacing the compressor is possible, but expensive. I installed a new heat pump (a Comfortzone Ex50) instead.
Matthias (matthias@fastmail.fm)